- Services
- Dynamic Captions
- Animated Avatars
- BWT Videos
- ChatBot Agents

AI ChatbotsSupport more customers with a friendly greeting and helpful chatbot agent.
- Chatbots Category
- Video Editing

Color Ready: A Colorist's Guide to Preparing Your Footage

Most of the problems a colorist corrects can be avoided with good preperation. The 3 main things a colorist fixes are exposure, white balance and color temp. What to do?
This article will help you prepare for hiring a colorist and getting the best work with the least confision. It walks you throuth camer setup, file management and informtion for talking with a colorist.
What To Do In Camera
Exposure: Set exposure using false color, zebras, or waveform, then your eyes. Keep highlights below clipping (especially skin). Avoid crushing shadows, set ISO to capture low light detail. Keep exposure consistent across shots . Use ND filters instead of raising shutter speed. Watch out for changing lighting conditions,
As a colorist, exposure is the first thing I correct. There are several tools that can fix exposure but the best one is the camera.
White Balance: Manually set white balance, never rely solely on auto. Match color temperature to the dominant light source. If your camera can adjust color temp, i.e. daylight, flourescent, cloudy, incandescent settings, match wb to your conditions.
Avoid mixed lighting (daylight + tungsten = splotchy patches). Mixed lighting results in reflections that will change the look of a scene and change the flavor, technically speaking. Be wary of colors that don't mix well.
~~flashback~~

I went nuts wondering what happened to my carefully graded shot, until I walked out on the set and discovered what the lighting guy had done. Who refused to take down the scrim even after I showed him what the camera saw. So, I turned to the director and asked if he would sign off on responsibility for the look of the video, in writing, so we could legitimately charge him for the almost inevitible post color grading session that was sure to follow. Down came the spotlight and out the window went a post production grading session I would surely have done.
~~The End~~
ISO & Noise: ISO is a standardization of the camera's sensitivity. And noise is unintended distortion. ISO amplifies the signals the sensor already receives. When you raise the ISO you also raise the signal to noise ratio. So, don't raise your ISO so you can see in the dark areas, you may just be adding noise.
A good camera will list it's native ISO detting, sometimes referred to as "Base ISO." If not you can test to find what is best for your camera.
Put the camera on a tripod and light a simple scene evenly. Shoot clips at ISO 100, 200, 400, 800, 1600, 3200, 6400. Look to see how much detail and noise you see in the dark areas. The ISO setting with the cleanest detail and least noise is your native ISO.
Use a slate with color bars and grey scale for reference. Keep WB consistent across the entire scene. If you really want to be prepared for color grading nothing is more helpful than good camera notes.
Include such data as scene, shot, take, camera settings, location and the mood e.g. warm, dark, sunny, cool, neon, blue, green, you get the idea, right?
Make your footage color ready with good, consistent slate information. Add it to your slate for every take or at least once during your shoot.

On the slate note f-stop, ISO, color temp, tint, fps and shutter angle, so you can match settings later. Also on the slate are roll, shot, scene, take # and production title.
Have you ever had to re-shoot, or get another angle, of a shot? With a slate that contains the right information a cinematographer (and a colorist) can quickly reach the right settings for a perfect match.
Oh yeah, a slate can also be used as a clapper to sync audio. When clapping make sure you do it with authority. No lazy claps, as silent claps are of no use if the microphone doesn't pick up the sound.
In The Can After The Shoot
File management: Presumeably your footage is recorded on an SD card or better yet an SSD (portable solid state) drive. Whichever device you use transfer speed matters. The faster, the better. Size matters as well. The more storage space, the longer you can record. The only drawback to this is when you try to edit your footage and the drive is overworked trying to keep up.
File naming can be a great way to organize your footage. Many cameras simply name the files as the time and day, when you hit the record button. Make sure your camera has the date set and is at the current time and day can really help identify the footage for the colorist.
Don't create proxies on the same drive as your footage. If you create proxies of your footage be sure to file those separately from your main media drive if possible.
Organize your footage: Create a file structure on your computer that makes sense. Start with a project folder and name that. Create folders underneath the project folder to itemize your media. If you use DaVinci Resolve give the clips keywords and include in bins.
Want your footage to look its best? I provide color correction, grading, and editing services on Thumbtack. Clients hire me for fast delivery, clear communication, and polished results. Tap into my Thumbtack service and make your footage shine...

How To Talk To Your Colorist
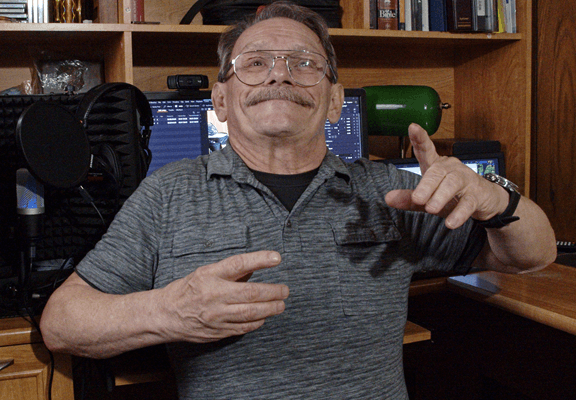
What you want? - to do with the final product, needs to be determined first. Examples include:
- For edit if you plan to use the rendered video in other post production processes.
- For release if you want to publish immediately to broadcast, internet or social platform
- For archival purposes if you want to keep a memory saved for posterity.
What do you have? - regarding existing video, photos, AI prompts, etc. that will be included.
- Video - If you have video specify what you know about it. It's formant i.e. HD, UHD,4K, Specify its frame rate; 24fps, 25fps,30fps. What codec it was made in if you know it; braw, mp4, ProRes, sony, rec709, etc.
- Audio - if you have any music, voice over or special sound you want included.
- Graphics - if you have any logos, titles, slogans or subtitles you want included.
You may be wondering why does a colorist want to know about included audio, titles and logos. While a colorist specializes in the technical part they use the artistic endevour to grade the style, mood and feel.
The colorist will grade accoring to content involved. For instance tthe scene might be a dark, dreary alleyway at night with city sound effects. Or, a sunny meadow on a mountainside in the spring with birdsong. Or, grandma's house on Christmas morning with Jingle Bells playing.
Branding also plays a role in a color grading session. Many brands have specific colors they want used. Knowing what colors are complimentary or contrary will affect the grade as well.
What do you want from the colorist? - a finished film, a scene by scene color grade, a one-light pass through, for editing, for special effect, etc. Know the different styles of grading. They are:
- One-lite - grading is set to a specific setting for entire segment. Good for archival footage'
- Mixed One-lite - grading is done on the fly or groups of scenes. Good for online video distribution'
- Scene by Scene - grade and program each scene, clip, photo, element on a one by one basis. Required for commercial grade video, short and feature films.
- Special effects and animation - color grading is often used for animation, motion effects and in conjunction with other video editing tools. Such as chromakeying, masking and visual special effects.
Sample: Color Ready Project Quote
Every job is different but typically a sample project would be grading camera footage shot for a specific reason. Be it short movies, internet distribution or video editing. So you would want to organize your first contact to include what you want as the final result, what you have to start with and what you want me to do with your material.
a conversation starter would be something like this:
"I am creating a short film about a chance meeting between 2 people. I shot it in 4k at 30fps on Sony A7 camera. The footage includes indoors, exteriors, park settings. I want parts of the film to be modern day and parts of it to be flashback style. I have a specific script the actors are narrating and want special effects in certain scenes. My finished film is 10 minutes long and I have over 2 hours of raw footaage. I want a scene by scene grade on the final cut? Can you give me a quote and specifiy your process."
See Also:
3d Animated Avatars - Meet the family of 3d animated spokespersons.
BWT Videos - animation, video editing and tutorial services.
Screen Recording Tutorials - video tutorial creation service page.
Video Editing - where you can custom order a video.
Home : Video Creation Tips Category : color ready



61 W. Annabelle Ave. Hazel Park,
MI. 48030-1103, U.S.A.
telephone: (248)546-0374
email: support@best-website-tools.com
© Copyright 2007-2026 All rights Reserved.
Sun: closed
Mon-Fri: 9:00AM to 6:00PM
Sat: 9AM-12:00PM
Closed Holidays
