- Services
- Dynamic Captions
- Animated Avatars
- BWT Videos
- ChatBot Agents

AI ChatbotsSupport more customers with a friendly greeting and helpful chatbot agent.
- Chatbots Category
- Video Editing
Mobile App Icons How To Create In Paint.net Tutorial With Illustrations
Icons are used to identify an app's purpose and is used as a launch mechanism on mobile devices and desktops. The app stores, Apple App Store, Google Play, Windows, Amazon and even progressive web apps all require at least one 'Application" icon be included with each app. There are several more various sizes of icons for various different mobile devices. Follow on to learn how to prepare icons for every device type.
Creating your own mobile app icons is not too difficult if you know what you need. In this tutorial we will be using 'Paint.net' graphic software to demonstrate how to create an application icon. We use this software platform because it is freeware and easy to use.
Creating Mobile App Icons And Sets
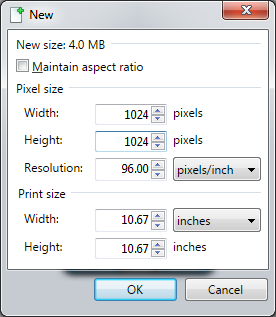
The 'Application' icon' for an iOS (Apple App Store) is to be 1024px by 1024px. That is big. But keep in mind that images can be resized. That means you can use one icon to make several different versions Here's how to make an 1024px SQ(uare) icon in Paint.net.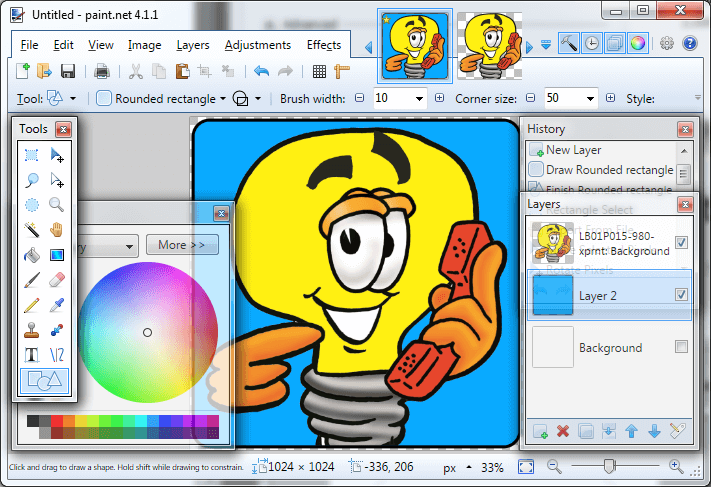
This tutorial is not going to tell you what to put into your icon that is up to you. However here are a list of things to keep in mind.
- While you must submit a 'square' image the overall image can be any shape. Shapes can be created by layering one image on top of the 'background.' Then simply turn the background layer off. Notice the rounded corners in our example icon.
- Images can be resized or scaled down much better than they can be scaled up. You can make one icon and scale it down to create several icons.
- This image MUST convey what the app is about. In this example we used a light bulb characature with a phone in hand. It signifies something that we use everyday to help us do what we do. The telephone signifies something we can do with the app.
 Step 2a. Add a new layer from the "Layers --> Add a new layer" drop down menu. Make sure the 'New Layer' is highlighted in the layers toolbox. Select "shapes" shortcut key from the "Tools" toolbox (bottom of toolbox). Set the 'brush' size to 10. Set the shape type to 'rounded rectangle.' Set color to whatever you want in the "Colors" toolbox. Draw a rectangle by placing your curser at location 0,0 (upper left corner). While holding down the left mouse button draw the curser to location 1024,1024, then let up the left mouse button. A rounded corner border appears.
Step 2b. Select the 'paint bucket' icon. Place your curser inside the rectangle and click the left mouse button, this will fill in the blank space inside the border. We used a blue that matches a color of our website and is in high contrast to the yellow of the characiture. You will want to use a color that makes sense to you.
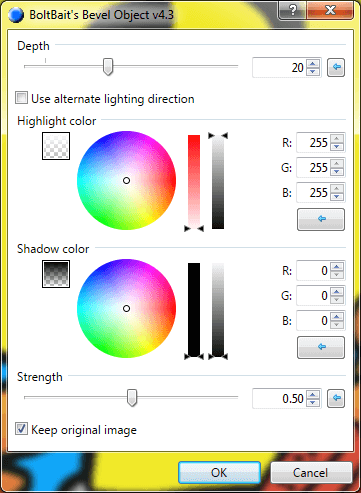
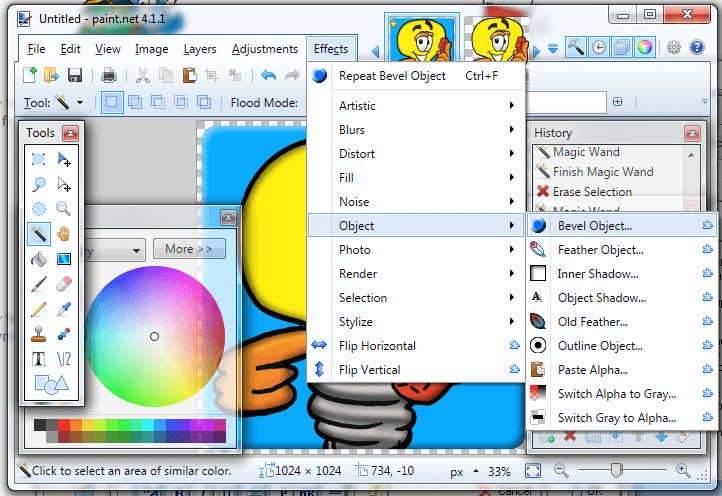
Step 2c. adding the bevel effect. From the "Effects" dropdown menu select 'Object --> 'Bevel Object.' A popup toolbox appears. From here you can change the size, colors and alternate lighting. For this exercise we accepted the default settings but feel free to play with the settings to achieve your desired look.
In th top tool bar "Corner size" can be changed in the "Corner size:" dropdown field. "Style" should be se to solid. Other options include 'dashed' 'dot' dot dash' and dash dot dot.'
In Paint.net select "shapes" shortcut key from the "Tools" toolbox (bottom of toolbox). Set the 'brush' size to 1, 2 or 3px depending on the size of your icon. Set the shape type to 'rounded rectangle.' Set background color to black in the "Colors" toolbox. Then draw a rectangle by placing your curser at location 0,0 (upper left corner). While holding down the left mouse button draw the curser to location 1024,1024, then let up the left mouse button. A thin rounded corner border appears that outlines the icon.
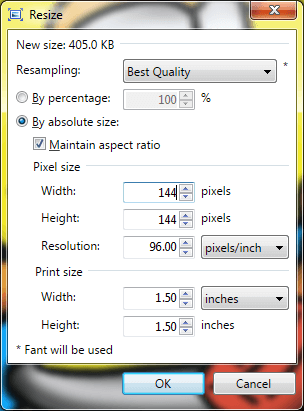 Now that you saved the original as a .pdn you can safely resize it to create more versions of your icon. A popular size is 144x144px.
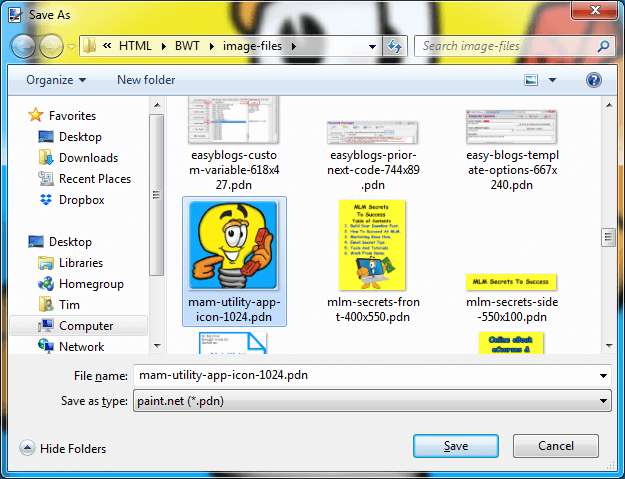
The App Stores prefer .png images for mobile app icons. When you 'saveas' a new image make sure you select the "Save as type" to be .png. This is important because .pngs allow for transparency.
This concludes the mobile app icons tutorial. As always if you have any questions feel free to contact BWT.
Creative Icon Solutions is a service provided by BWT to create custom icon sets for mobile and desktop applications. All apps require at least one icon to be associated with the app. However you can submit up 15 different sizes for various purposes. Different platforms, iOS, Android, Retina, desktop and more use various sizes for app icon display.
![]()
![]()
![]()
![]()
Custom Mobile App Icon Set Service
Do you need mobile app icons for your next project? Confused about which sizes of icon you need for which application? Why not get a set of similar icons and have them all covered?
Are you looking for an icon template? Check out our template and tutorial bundle just below. The downloadable zip file contains 10 pre-made sizes of PaintdotNet (.pdn) templates. Simply include your own centerpiece. Easy-peazy, nice and easy.
Mobile App Icons Sets And Tutorial Bundle
$29.97
Our Price $9.97
Get these mobile app icons. Includes these sizes: 1024px. 512px.180px, 144px, 114px, 96px, 72px, 57px, 48px and 36px SQ. Plus this tutorial in a pdf document. The 1024px size has 3 backgrounds, red, green and blue. Use this templafe to build you own icon sets.
Why buy an icon set from BWT? Great support. We want you to be happy so we are always here for you. Drop us a line anytime you need help and we will be glad to help you out.
Home : Mobile Apps : Mobile App Icons

61 W. Annabelle Ave. Hazel Park,
MI. 48030-1103, U.S.A.
telephone: (248)546-0374
email: support@best-website-tools.com
© Copyright 2007-2026 All rights Reserved.
Sun: closed
Mon-Fri: 9:00AM to 6:00PM
Sat: 9AM-12:00PM
Closed Holidays
