- Services
- Dynamic Captions
- Animated Avatars
- BWT Videos
- ChatBot Agents

AI ChatbotsSupport more customers with a friendly greeting and helpful chatbot agent.
- Chatbots Category
- Video Editing
Article Template Modification For EasyBlogs to Add Meta Tags and RSS Auto Discovery
Note: Before you begin, please be sure that you have read the tutorial, Understanding How The EasyBlogs Template Works so you can get around the different parts of your template.
Modifying Your Blog Template
Step 1. Open the Easy Blogs software and go to All My Blogs and then, click on Template Editor.
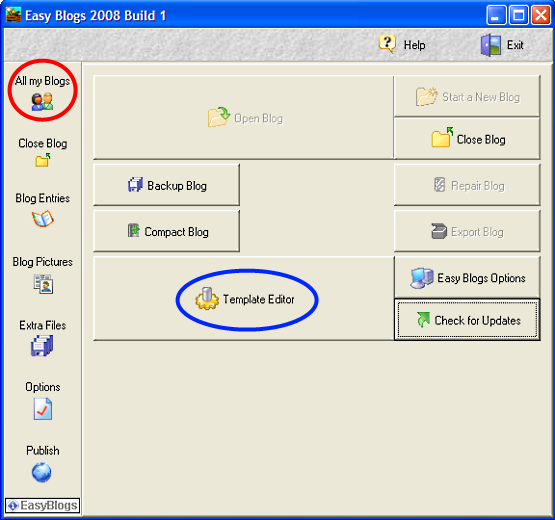
Step 2. ![]() and select the template from the list that you are currently using for your blog.
and select the template from the list that you are currently using for your blog.
Step 3. Click on the "Article Pages" Tab on the left.
Article Template Modification To Add Meta tags & Auto-discovery
Step 1. Go to the "Start of Page" tab of the Articles Pages (be sure you are in the Article Pages of the template editor.
Step 2. Delete the lines that say:
<META Name="Description" Content=" ">
<META Name="Keywords" Content=" ">
Step 3. Insert the following 2 lines of code:
<meta name="keywords" content="[%thispage.metatag.keywords%]">
<meta name="description" content="[%thispage.metatag.descriptions%]">
Step 4. Right below where you inserted the code in Step 3, insert your auto discovery code using the following steps:
Step 4a. Copy and paste the below code into Notepad or some other HTML editor (don't use MS WORD!):
<link rel="alternate" type="application/rss+xml" title="Title of Your Blog" href="http://www.mywebsite.com/rss.xml">
Step 4b. Modify the red sections of the code to fit your website.
Step 4c Copy the modified code into your template right below where you inserted the code in Step 3 above.
When done, it will look like this:

Click Save ![]() in the top menu bar to save your insertions.
in the top menu bar to save your insertions.
Article Template Modification To Add Google AdSense Ads
To add the AdSense code to your article, go to the "Article" tab of the "Articles Pages" section of the template editor.
Insert the code from your AdSense account between the ADSENSE markers using the appropriate ad block for best results.
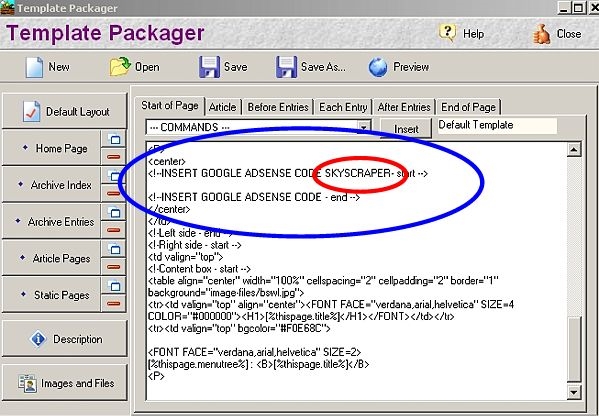
Note: not all templates have these markers included. Please use good judgement when placing Google AdSense code. Make sure you read Google's 'Terms of Service' document before adding AdSense to your website.
Click Save ![]() in the top menu bar to save your insertions.
in the top menu bar to save your insertions.
NOW------- Go to the tutorial, How To Create Articles In Easy Blogs That Are Fully Search Engine Optimized and Ready For RSS Syndication! to Setup your Settings....very important so don't miss this step!
Have you added the meta tags feature to your default pages? Find the tutorial to add meta tags to your default pages is here
| All template modifications require that you: a) re-publish, re-generate your pages in the blog software |
That wraps up the Article Template Modification Easy Blogs Tutorial. To get the full tutorial look here.
EasyBlogs Software And Tutorial
$167.95 $99.95 $29.95
Complete system builds HTML and XML website files. All you do is post and upload.
Customer Service - Get free support for 30 days forever. Learn more...
Home : Website Design Tips : Article Template Modification

61 W. Annabelle Ave. Hazel Park,
MI. 48030-1103, U.S.A.
telephone: (248)546-0374
email: support@best-website-tools.com
© Copyright 2007-2026 All rights Reserved.
Sun: closed
Mon-Fri: 9:00AM to 6:00PM
Sat: 9AM-12:00PM
Closed Holidays
